Many thanks to Phil for allowing me to use the following excellent piece on Cotton Manufacturing.
DESCRIPTION OF COTTON MANUFACTURING
THIS IS AN ACCOUNT, BY A FORMER MILL WORKER, OF THE MANUFACTURING PROCESS, FROM COTTON WASTE TO FINISHED YARN, IN ONE OF THE MANY COTTON MILLS THAT USED TO OPERATE IN THE TOWN.
 Balls, for the production of mop yarn, were made at Daniel Woods, Victoria Mill, Victoria Street, New Mills. All the processing was for the manufacture of cotton mops used by Her Majesty’s forces, mainly the Royal Navy, for the Merchant Navy and for domestic use. This is the story of the balls and their manufacture at Daniel Woods, Victoria Mill.
The mill, sadly, is no more it was razed to the ground after a devastating fire on the 13th March 1986. Balls, for the production of mop yarn, were made at Daniel Woods, Victoria Mill, Victoria Street, New Mills. All the processing was for the manufacture of cotton mops used by Her Majesty’s forces, mainly the Royal Navy, for the Merchant Navy and for domestic use. This is the story of the balls and their manufacture at Daniel Woods, Victoria Mill.
The mill, sadly, is no more it was razed to the ground after a devastating fire on the 13th March 1986.
The process began with the waste cotton arriving in 500 lb bales wrapped in sackcloth and bound with steel bands. As you will learn from this account gravity did a lot of the work. A hoist, worked by one of the 3 yardmen, took these to the top of the 5 storey mill. One of the yardmen also doubled as the boiler man.
On Monday morning the first job was mixing these bales in the mixing room on the fourth floor. The bales were opened and then dropped through a trap door in the floor above and were torn apart and strewn about and mixed with other bales of different types and/or colours. The mixing room was approximately 12 –15 ft square by 10-12 ft high, and when full it probably held enough volume for about a week’s production. If more was needed, we had to do another mix. This mixing used to take about 7 men 2-3 hours altogether. For special orders, which were carded in the top room, there were twofold and bleached runs.
The next process was the willowing of the raw cotton. This was first dropped through the floor from the mixing room before going through the willow. This machine started to break up the raw cotton into smaller pieces, and to look for metal. The cotton mix passed under an electromagnet that crossed the width of the willow and any metal found would stop the machine automatically. One man operated this machine – it was a vital operation because sparks from tiny bits of metal going through machinery might easily have caused a fire.
The raw cotton dropped again through the floor and the next process was the picker machine. The picker was situated in the room known as the cellar. It reduced the raw cotton in size even more. The picker was linked to the blowing machine via an air-assisted tube of about 2 ft diameter. These two machines were in the same room and formed an inverted U shape. The blower reduced the fibre still further, and made it into a lap, it then looked like an enormous roll of cotton wool.
The lap was wound onto an aluminium tube on a mandrel approximately 3ft long. When full the lap was taken off and carried to the lift. The blower required two men to run it, the machine man and the lap carrier. The lift conveyed 6 to 9 laps at a time to the carding rooms. These rooms were known as 2nd,3rd and top rooms.
Carding was the next stage in manufacture.
The cards used at Danny Woods consisted of a pair i.e. a back card and a finishing card. Normally 3 laps went on each back card, they were fed into the card where the processes of teasing the staple, so that fibres are all straight and aligned, was done by sets of rollers over a large cylinder. It then came off the back and was formed into a web by an oscillating blade. The web was carried by a small conveyor on to a plater where it entered the rear of the finishing card. Here it was teased and straightened further by the rollers and large cylinder before passing onto a small cylinder at the front of the finishing card. Then it was taken off the smaller cylinder by an oscillating bar and passed through a divider that split the web into 18 separate ends. The ends were all passed through two rubber belts, one above the other, that rolled and twisted the separate strands into something resembling a cotton thread.
At this stage of the processing the carded cotton, now called a roving, was quite thick but with no strength at all. It took one operator in the top room, one in the 3rd room and two operatives in the 2nd room to complete the work. The roving was then wound on to a 3ft long flanged bobbin. When there were three or four bobbins ready they were taken down to the ground floor - the bottom room. All the above descriptions refer to male operatives but from now on all the descriptions refer to the female operatives.
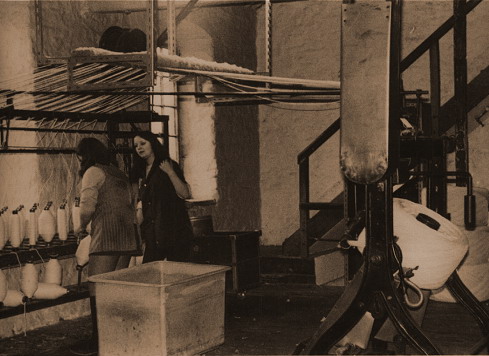
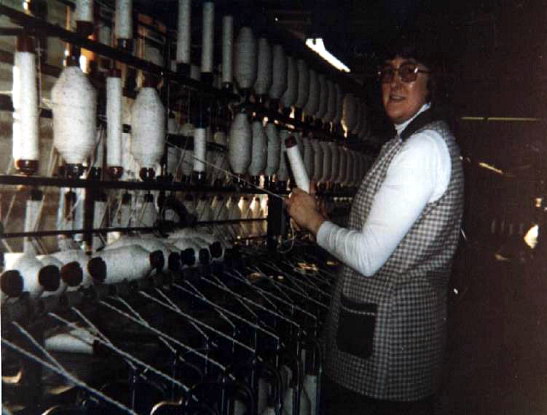
The next stage of manufacture was spinning on ring spinning frames, which were installed in the bottom room.
The ring spinning frames were installed in pairs facing each other and require two operatives, known as spinners. Look at the picture, the large bobbins from the cardrooms can be seen at the top of the frames. When in place the cotton rovings were then pulled out and stretched via a pair of draughting rollers and twisted by the spindles – which were not only spinning round but also rising and falling - as it was wound at speed, guided by the flyer, on to many small bobbins. The wound cotton on the bobbin was called a kop. There was a pair of spinning frames in the third room and also the top room. When the bobbins were full the kops were doffed (mill speak for “taken off”). The operative knew it was time to start doffing when a small amount of overrun piled on top of the flyers. Other operatives would come over to help in this task.
The ring frames had two rows of bobbins. I don’t know exactly how many spindles per machine but some idea can be gained from the picture here. There were four of these ring frames in the bottom room, a pair in the third room and another pair in the top room.
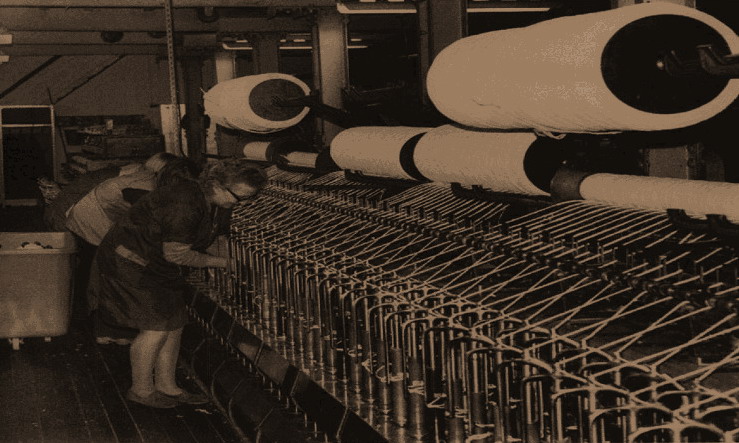
The next stage was doubling.
Here is a picture of the front of a doubler showing two rows of kops with the spindles below. The operative is Mrs Peel - a single operative at the front of the machine.
There were two doublers in the bottom room, one for each pair of spinning frames. There was also one in the top room. The layout in the bottom room was a pair of spinners followed by a doubler then the same again. The doubler consisted of a creel back and front. The back creel had four rows of kops, the front creel had two rows with the spinners below as shown in the picture. Just like the spinners, these rise and fall whilst winding.
The kops were tied on whilst the machine was in motion. If a lot of kops were running out at the same time, you would have to stop the machine. You would then try to put in some pieces to break up the creel so that you wouldn’t have too many to cope with at one time. You could use any number of ends for the required thickness and strength of thread wanted, but a standard thread set-up usually used three ends per spinner, this meant that it was actually trebled rather than doubled. As with the spinners other operatives would help with the doffing. After the kops were doffed, they went to the final stage of manufacture.
 The balling machine consisted of a creel using the bobbins from the doubler. These bobbins unwound at quite a high speed so that the bobbins had to be tied very quickly. The baller wouldn’t be stopped unless a large number of bobbins were running out together.
From the creel, the ends went through a pot eye to draw the ends together to form a rope. They then passed through a brass tube that rotated around a central cone in the centre of the baller frame. The baller ran on until it stopped automatically. A completed ball weighed over 50lb. The rope was then cut and the ends tucked in to the ball, which was lifted off and placed on the floor. It was heavy work - 50lb plus is a large load for a woman to lift. All the cut ends were wrapped together at the end with a thread to hold them in place. An endless piece of cord, fixed to a peg on the cone, was attached over this, which was wound on two or three times by hand to start it off again. The baller was then switched on again to make more balls. Tying knots was the name of the game in this job, the quicker the better. New girls were normally put on the baller job, it was both dusty and heavy but it taught you to tie knots quickly. Knot tying is required in all the spinning, doubling and balling operations.
Finally the yardmen collected the balls and took them across the yard to the warehouse for weighing, storage and, later, distribution.
Additional notes.
1. Fire was a very big threat. A fire started in the cellar one afternoon on the blower and we had taken 5 or 6 laps out of the lift and found several of them were alight (which were out in the yard) and these were doused with water, burning embers were pulled out of the blower and we were given the all clear by management and that should have been the end of it. Finishing time came and every one went home. But during the night, a lap that was left in the lift caught a draught and ignited. This burnt through the lift floor, and the wiring then set the sprinklers off so by the following morning the lift shaft was filled with about two or three feet of water, the bottom room was ankle deep in water, and we were met by water running down the road. We lost a full morning’s production while we all helped to clean up. This is just one incident, but fire was a regular occurrence on nearly a daily basis.
© Philip Nadin 16/03/2010
With contributions on the Baller and its working by Kath Nadin
My thanks to John Humphreys and New Mills Local History Society for permission to use pictures 1, 2, 3, and 5. Thanks also to Mrs Peel for picture 4.
 | 
.jpg)
.jpg)